
The Edition of mainframe files is generally an overwhelming task. Usually, it takes some valuable time to detect errors and make important changes. Generally, an experienced engineer could take about 5 days to create a mainframe screen without any error.
Fortunately, Mapset, a new, innovative and dynamic tool designed to manage screens in different mainframe coding languages, can help with this task. With Mapset, the edition of BMS files can go from a few days to just a few hours.
The Editor
The Editor is an innovative, versatile and dynamic tool that allows you to design, in a very simple way, screens in different mainframe encoding languages. Currently, only the BMS Files edition is supported.
Available Options
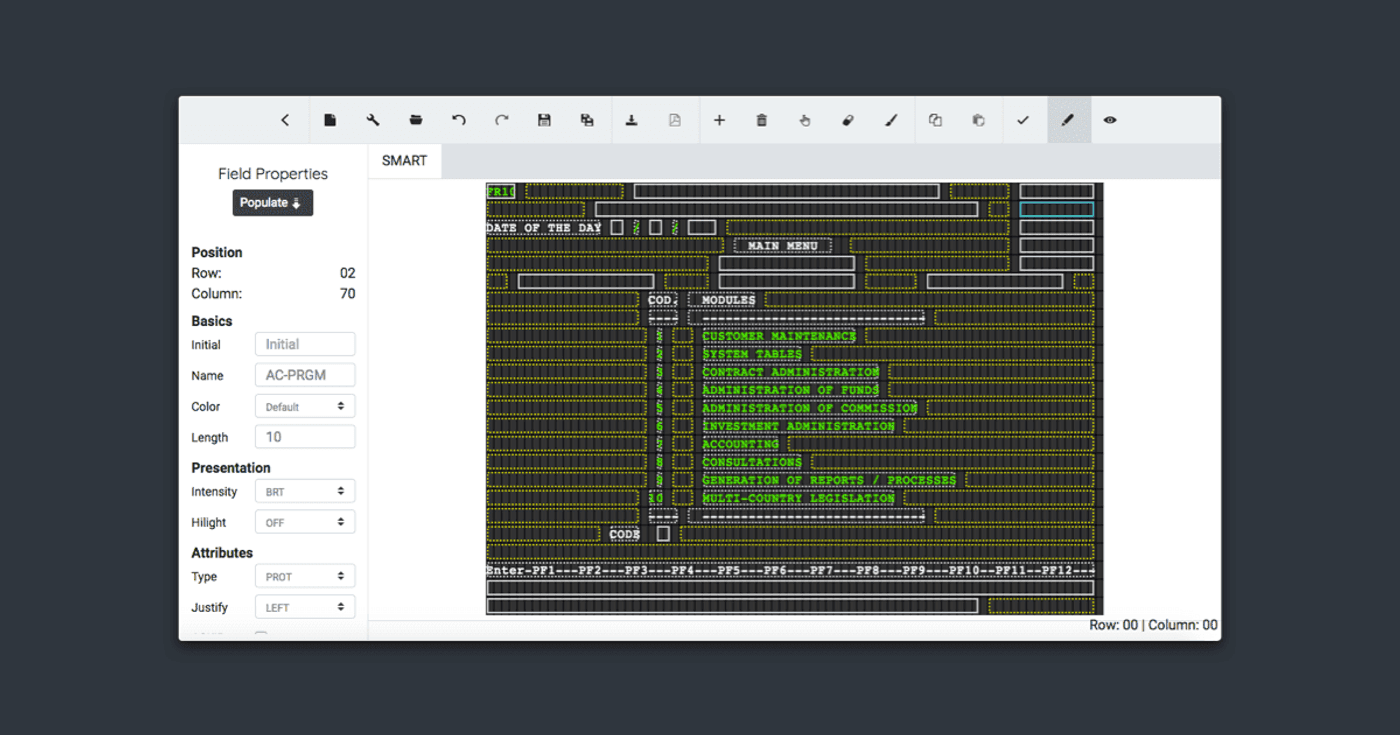
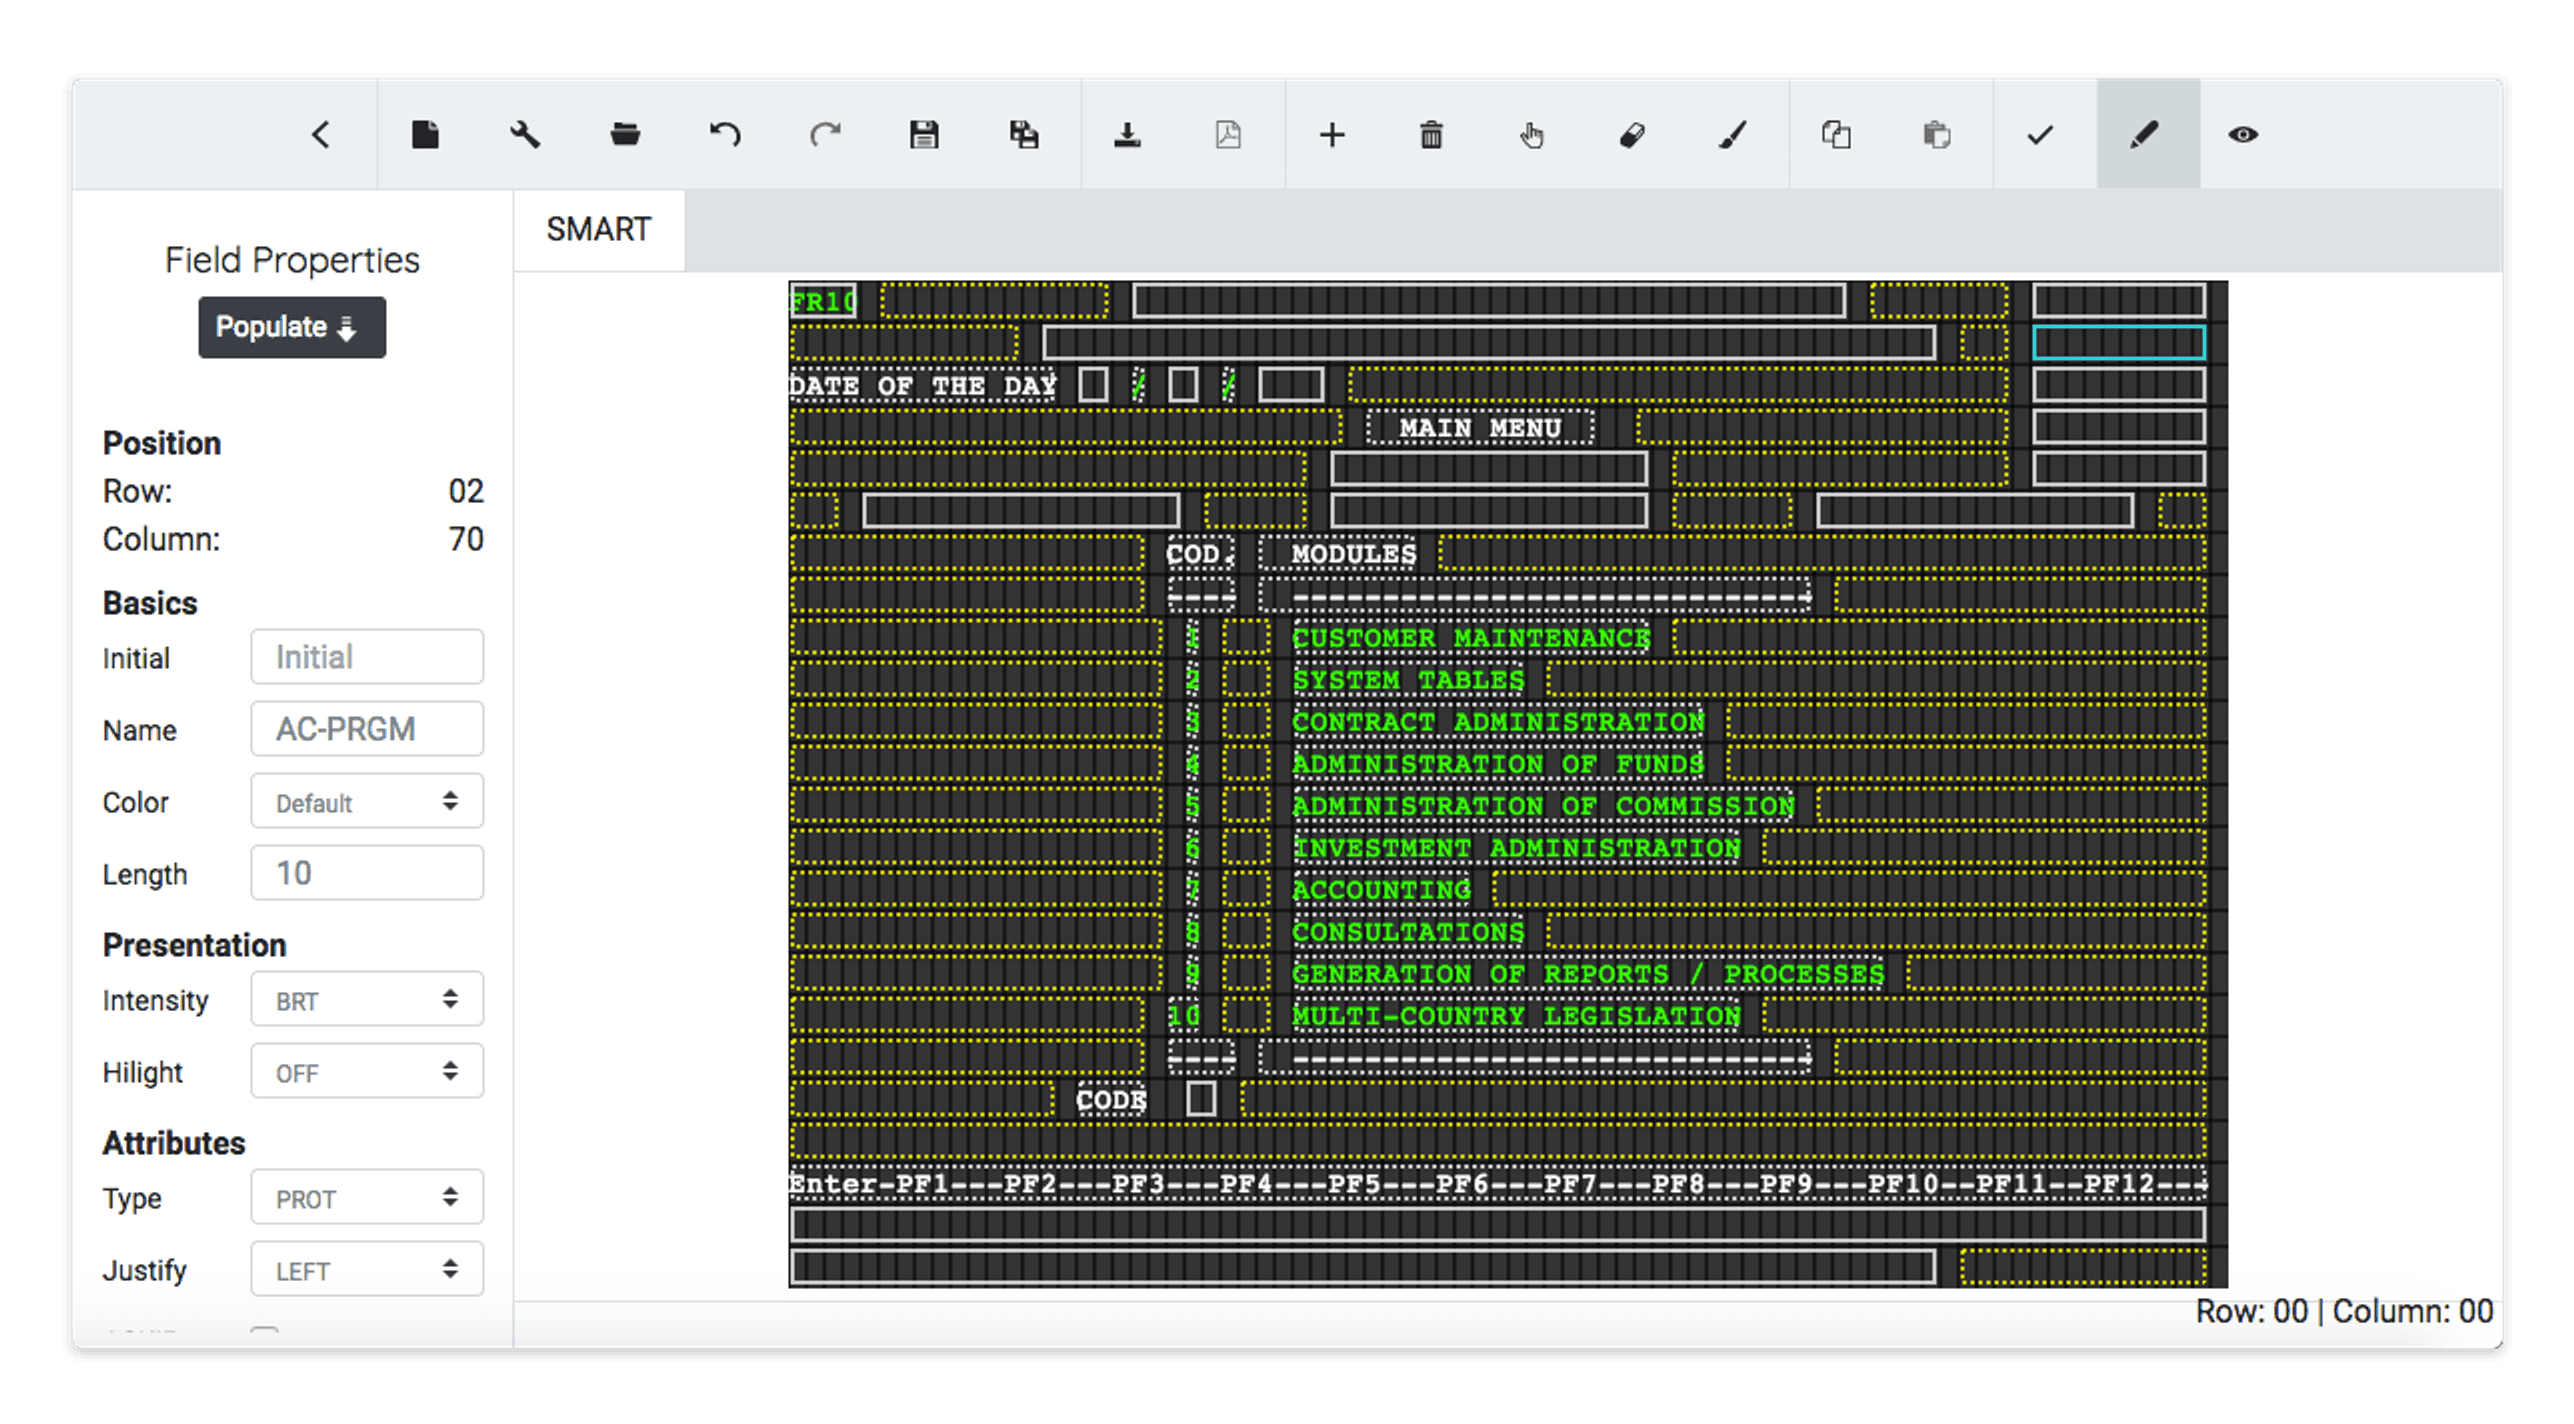
In the upper area of the Editor, there is a bar with all the options that can be used for the manipulation, creation and/or modification of each of the fields in your BMS file.

From left to right, the meaning of each option is indicated below:
- Parent Project: allows going to the page where the BMS files of the project are shown, to which the file currently in edition belongs.
- New File: allows you to create a new BMS and open it in a new tab.
- Map Properties: allows you to edit the Map property. More information in the Map Properties section located below.
- Open: it allows to open, from any Project (to which your user has access), and to locate in another tab an existing BMS to make modifications or to copy fields of this for another BMS that is open in the editor.
- Undo: It allows returning a previously made change in the work area, either by displacements or modifications that have not been successful.
- Redo: allows having a change made in the work area, which could be erased or modified without intention.
- Save: allows saving everything created and /or modified in the Work Area.
- Save as: allows saving everything created and/or modified in the active BMS File, with a different name in the desired Project.
- Download: allows downloading in plain text the last saved changes in a valid BMS format. This option is only active if the BMS in edition does not have any error. You can see an example file generated by the editor here.
- Generate PDF: allows generating a BMS in PDF format, to be evaluated or commented by another person. You can see an example file generated by the editor here.
- Add New Fields: allows creating new fields quickly in the Work Area.
- Remove Fields: allows you to delete one or more fields that have been defined in the Work Area.
- Select Multiple Fields: while this option is active, one or more fields can be selected to be changed or eliminated more quickly and conveniently.
- Delete Blank Fields: it allows eliminating all the fields that are as separators and blank.
- Add Blank Fields: allows you to add blank fields between empty positions between the variables that are created in the editing BMS.
- Copy Fields: When this option is active, it allows the user to choose one or several fields that they wish to copy in the Work Area.
- Paste Fields: After using the previous option, the user places the cursor in the area where it wants to copy the previously copied fields and with a simple click, those fields are copied.
- Validate Errors: allows the user to validate the syntax errors that the editing BMS could have and thus avoid unnecessary delays when loading it in a development or production environment.
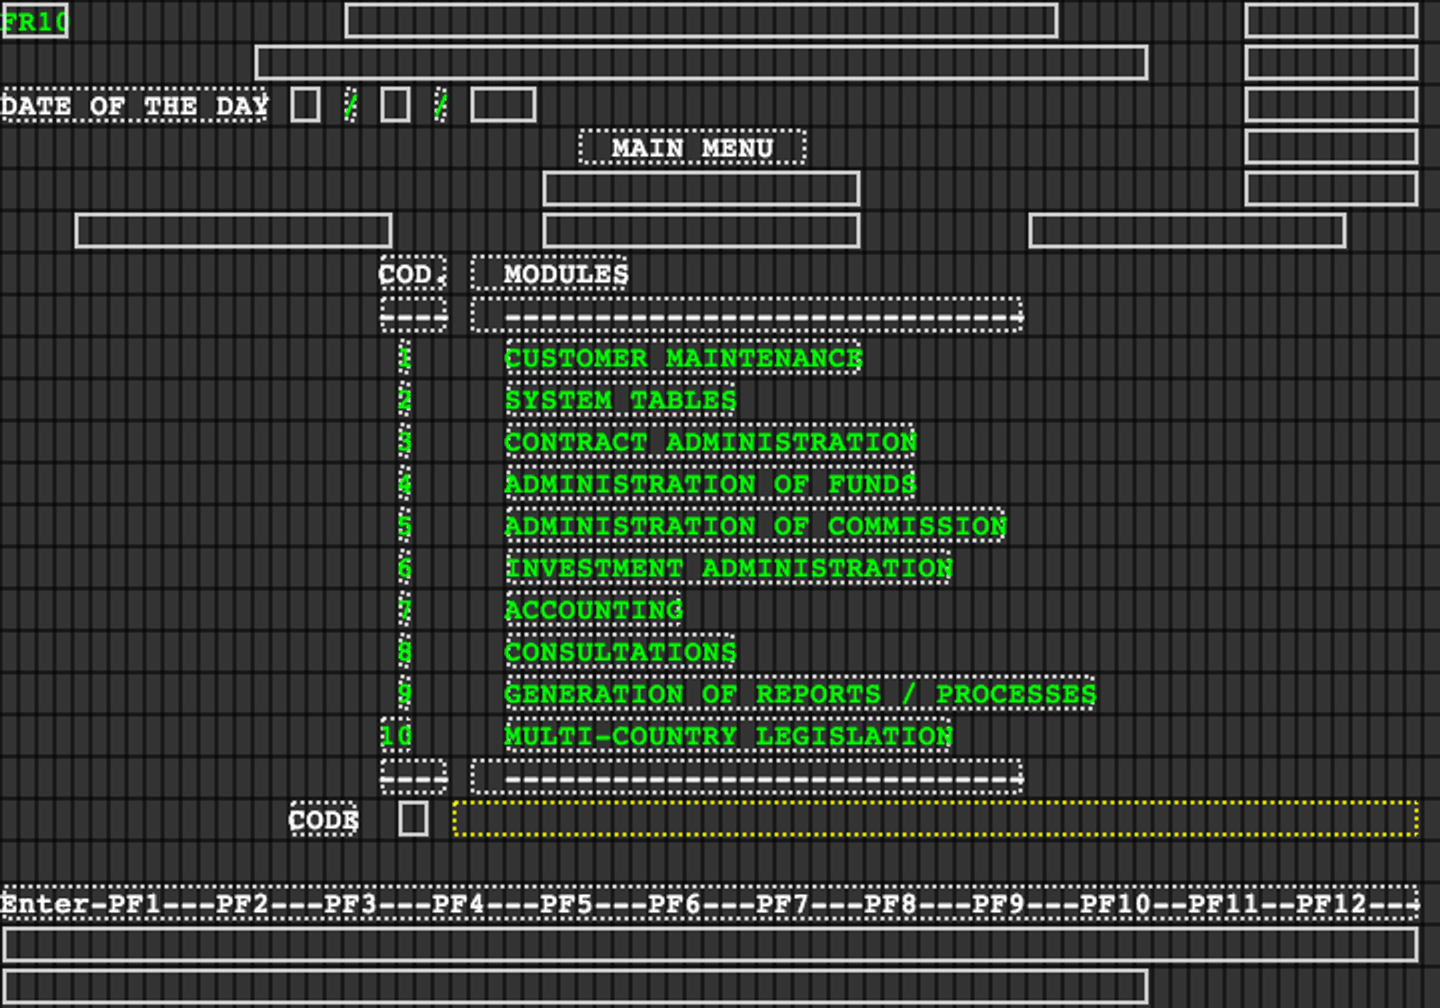
- Edit Mode: this option indicates that you are working in the BMS design mode in the work area.
- Preview Mode: this option shows the BMS in the same way as it would look on the CICS 3270 screen.
Edit Mode
Preview Mode
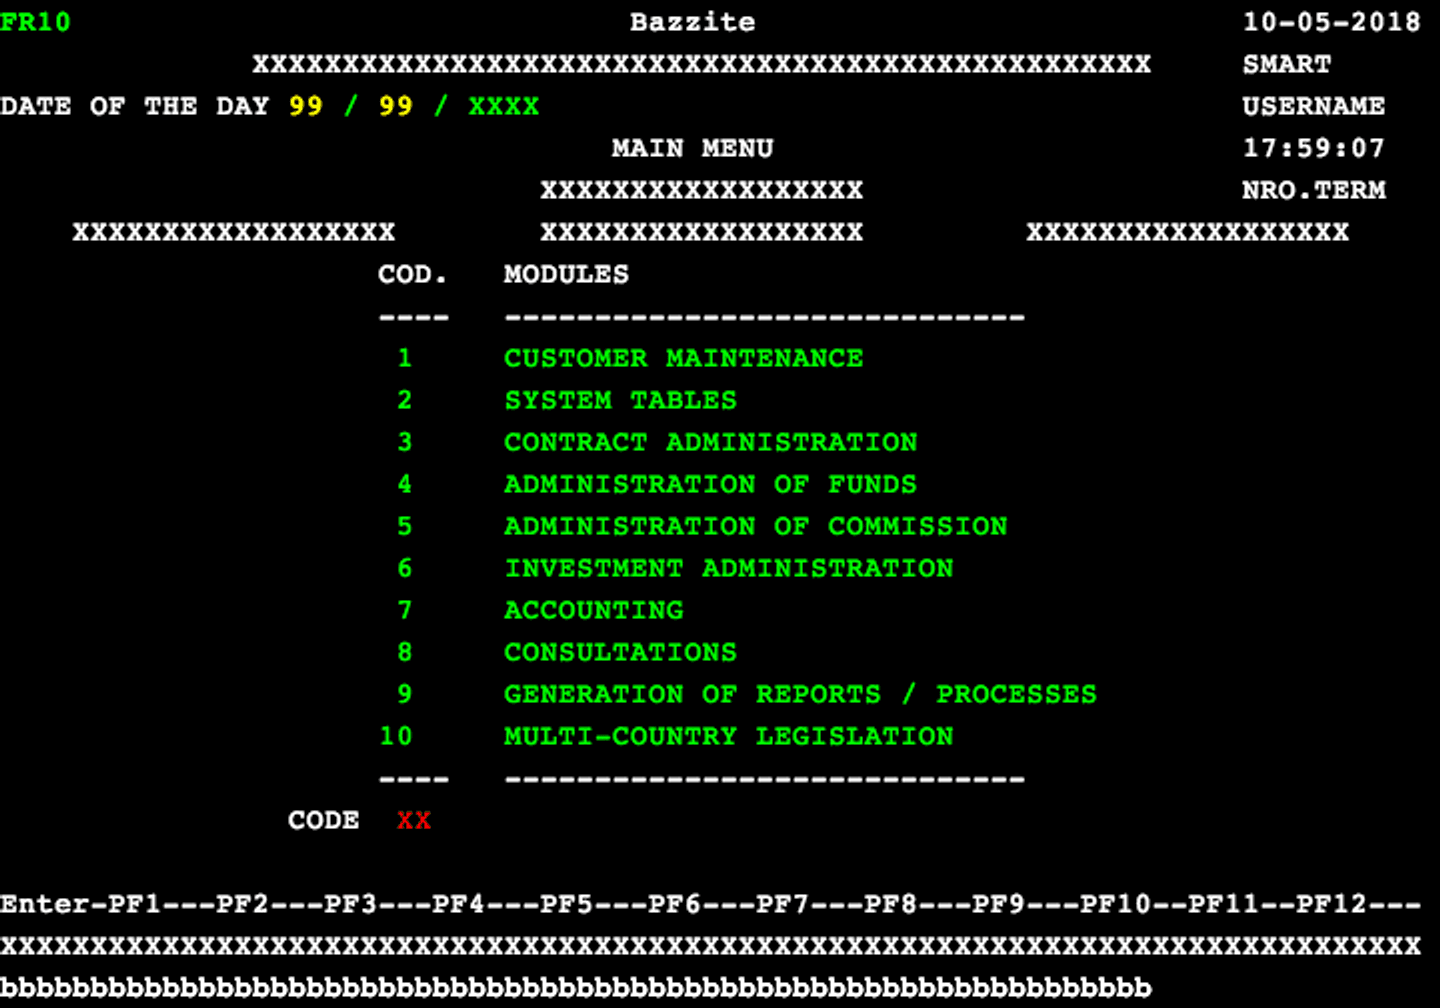
When you are in the Preview Mode the only option that can be used is: Generate PDF.
When you are in Edit Mode, the only option not available is Generate PDF. The other options will be available if their use is allowed in the action that the user is performing at that moment.
Field Properties
The Left Panel allows you to define the properties of the editing BMS fields. These are available the same properties that are used to create a BMS and with the same parameters as described in the IBM BMS manuals.
Map Properties
The Map Properties option in the toolbar, it allows opening a new window where the General Properties of the BMS that is being edited are indicated.
The following parameters can be modified:
- BMS Size:
- Number of Rows (High): from 2 to 24.
- Number of Columns (Width) from 11 to 80.
- The physical position of the BMS on the 3270 screen:
- Lines: from 1 to 23.
- Columns: from 1 to 80.
- Style
- The default color of all the fields included in the BMS: Neutral, Blue, Turquoise, Green, Pink, Red, and Yellow.
- Header Standard: Activating this option will create a standard header in the work area with fields that include: transaction code (TRANID), company name (TC-EMPRESA), date (AC-DATE), name of the program (AC-PRGM), user code (AC-USER), hour (AC-HORAE) and the terminal number (AC-TERM).
- PFS: When activating this option, two lines will be created in the work area: one that indicates the available PFS and another line at the bottom to be filled by the user in the position of each PF.
- Message: This option creates, in the 24 row of the BMS, a blank line of 64 positions that will be available as a message area.
As you could see, this editor is versatile and easy to use and it’s similar to Microsoft PowerPoint© but simpler. Don’t be afraid and try it.